First, verify your Ninja blender is plugged into a functioning outlet by testing it with another device. Check the assembly: align the lid and jar, secure the blade, and firmly set the pitcher on the base. Inspect the power cord and plug for damage. Unplug the blender, wait 15 minutes, then test again to reset the motor. Clean contacts and look for overheating signs. Continue to discover additional troubleshooting methods.
Key Takeaways
- Verify the blender is plugged into a working outlet and test the outlet with another device.
- Ensure all assembly components, including the lid and jar, are securely aligned and locked into place.
- Inspect the power cord for damage and ensure it is properly connected to the blender and outlet.
- Allow the motor to cool for 15 minutes if overheated and test again.
- Check internal components for damage and ensure secure wiring connections.
Checking the Power Source
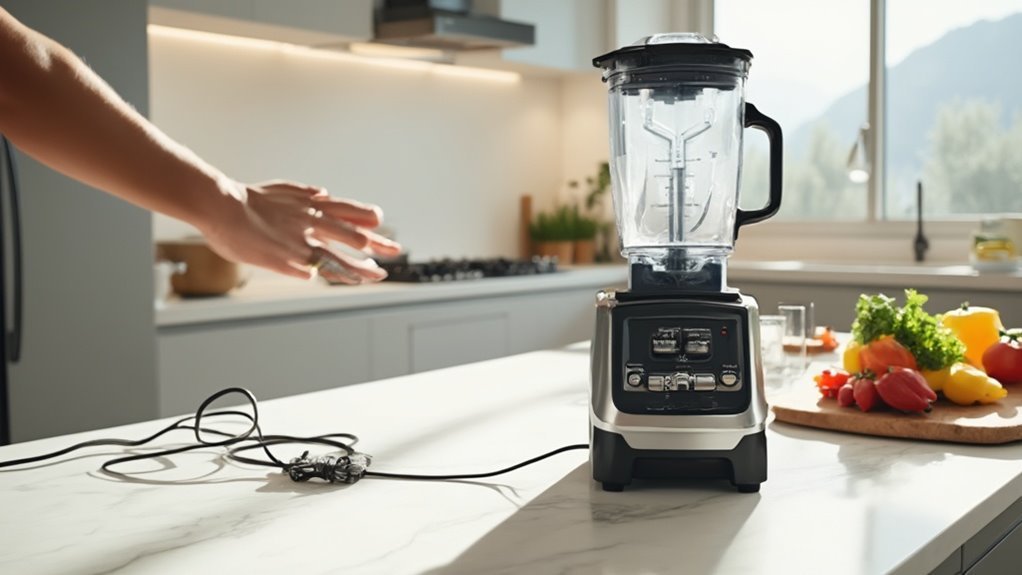
When your Ninja blender won't start, begin by checking the power source, as this is often the simplest fix.
First, verify the blender is securely plugged into a reliable power strip. If it's using a power strip, test the strip with another device to confirm functionality.
Next, plug the blender directly into a wall outlet, bypassing the power strip to eliminate it as the issue.
Check the outlet voltage with a multimeter to verify it's providing adequate power. Standard U.S. outlets should deliver around 120 volts. If the voltage is low, try another outlet.
Doing these steps empowers you to troubleshoot efficiently, avoiding unnecessary repairs or replacements, and granting you the freedom to blend with confidence and ease.
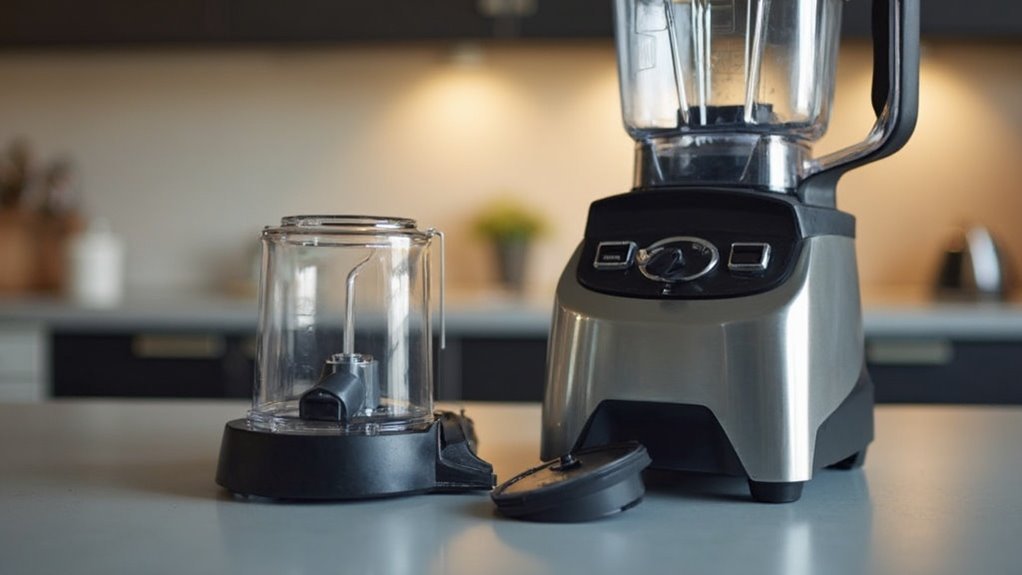
Ensuring Proper Assembly
To guarantee your Ninja Blender functions properly, start by aligning the lid and jar correctly to prevent any leaks or operational issues.
Next, secure the blade assembly into the base by tightening it firmly until you hear a click.
Finally, check the locking mechanism to confirm everything is securely in place before you power up the blender.
Lid and Jar Alignment
Proper alignment of the lid and jar is essential for your Ninja blender to function correctly. If it doesn't turn on, verify the lid placement and jar stability are spot on. Follow these steps:
- Check Lid Placement: Verify the lid is seated correctly. Align the arrows on the lid and jar. If misaligned, the blender won't start.
- Confirm Jar Stability: Verify the jar sits securely on the base. Gently twist the jar until you feel it click into place. This verifies the blender can operate without wobbling.
- Secure the Spout: Make sure the pour spout on the lid is fully closed. If open, it might prevent the blender from starting.
Blade and Base Connection
A crucial aspect of your Ninja blender's performance lies in the blade and base connection. Ensuring proper assembly can prevent malfunctions. First, check blade alignment by seating it correctly in the jar. Misalignment can disrupt motor connections, causing your blender to stay silent. Follow these steps:
| Step | Action |
|---|---|
| 1 | Remove the jar from the base. |
| 2 | Align the blade assembly. |
| 3 | Securely place it on the base. |
| 4 | Test the blender function. |
If the blade's not properly seated, the motor won't engage. This alignment guarantees the motor connections activate smoothly. Remember, freedom in the kitchen means releasing creativity without interruptions. By ensuring this connection, you'll enjoy blending with confidence and ease.

Locking Mechanism Check
For ideal performance, guaranteeing the locking mechanism is properly engaged is essential.
Start by identifying the locking mechanism types your Ninja blender utilizes. Here's how to troubleshoot effectively:
- Check the Pitcher and Lid Alignment: Guarantee the pitcher is seated correctly on the base. The lid should align with the arrows marked on the pitcher for secure locking.
- Engage the Safety Tabs: Some models have safety tabs. Verify these are in place, as they prevent operation if the assembly isn't right.
- Inspect the Power Pod: On models with a separate power pod, guarantee it's securely attached. A misalignment can disrupt the locking mechanism's function.
Inspecting the Power Cord
Begin by checking the power cord for any visible damage like cuts or fraying.
Next, make certain the cord is securely connected to both the blender and the power outlet.
Finally, test the outlet's functionality by plugging in a different device to confirm it's working properly.
Check for Visible Damage
Before diving into complex solutions, it's crucial to inspect the power cord for any visible damage when troubleshooting your Ninja blender.
Start by examining the entire length of the cord, looking for visible cracks or surface scratches that could be causing interruptions in power flow.
Follow these steps:
- Inspect for Cracks: Carefully check for any visible cracks along the cord. These can indicate internal wire damage which might prevent the blender from turning on.
- Check for Surface Scratches: Look for surface scratches that might expose underlying wires, posing a safety hazard and impacting performance.
- Assess Cord Flexibility: Bend the cord gently to see if it maintains flexibility or if any areas feel stiff or fragile, which might suggest internal damage.
Ensure Proper Connection
Although you've checked for visible damage, it's equally important to guarantee that the power cord is properly connected to your Ninja blender.
Start by ensuring the plug is securely inserted into the outlet. A loose power connection can cause electrical issues, preventing your blender from turning on.
Examine the plug for any bent prongs or obstructions that might hinder a solid connection. Once confirmed, trace the cord back to the blender, ensuring it's firmly attached.
Occasionally, cords can become dislodged from their sockets during use or cleaning. By ensuring every connection point is tight and secure, you minimize the risk of electrical issues.
If the blender still doesn't turn on, consider the possibility of internal faults and further troubleshooting steps.
Test Outlet Functionality
Why not start by checking if the outlet is functioning properly? Testing outlet functionality can save you time and hassle.
Here's how to guarantee your power source is reliable:
- Outlet Voltage Measurement: Use a multimeter to check the outlet's voltage. Set it to AC voltage, and carefully insert the probes into the outlet slots. A reading around 120 volts indicates a healthy outlet.
- Test with Another Device: Plug in a different, working appliance like a lamp. If it doesn't turn on, the issue might be with the outlet, not your blender.
- Inspect the Circuit Breaker: Sometimes, a tripped breaker is the culprit. Locate your home's breaker panel and reset any tripped switches to restore power.
Examining the Lid and Safety Mechanisms
Ensuring your Ninja blender operates smoothly often begins with examining the lid and its safety mechanisms, as these components are vital for proper functionality.
First, check the lid safety by ensuring it's aligned correctly with the pitcher. A misaligned lid won't engage the mechanism functionality, preventing the blender from operating.
Next, inspect the tabs on the lid and pitcher. These must interlock properly to activate the safety switch. If the tabs are damaged or worn, replace the lid.
Additionally, clean the lid and pitcher edges to remove any debris obstructing the connection.
Finally, verify that the pitcher is firmly seated on the base; this is essential for the blender's safety features to engage properly, granting you freedom from operational hiccups.
Resetting the Motor
Once you've confirmed the lid and safety mechanisms are functioning properly, it's time to address another common issue: resetting the motor.
Motor failures often occur when the blender's internal systems need a restart. Here's a step-by-step guide to help you regain control:
- Unplug the Blender: Disconnect it from the power source to guarantee safety. This is the first step in any resetting technique.
- Wait 15 Minutes: Give the motor time to cool down. Overheating can trigger automatic shut-offs, preventing the blender from turning on.
- Reconnect and Test: Plug the blender back in and try turning it on. If the motor still fails, further investigation might be needed.
Addressing Blade Jams
Blade jams are a frequent issue that can disrupt your blending tasks, but they're relatively easy to fix with the right approach. First, unplug your Ninja blender for safety. Inspect the blades for obstructions such as food debris. Use a brush to clear them. If the blade feels stiff, apply blade lubrication to enhance movement. If the issue persists, consider blade replacement.
Here's a quick guide:
| Step | Action | Result |
|---|---|---|
| 1. Inspect | Check for obstructions | Identify jammed material |
| 2. Lubricate | Apply blade lubrication | Smooth blade operation |
| 3. Replace | Install new blades | Restore full functionality |
Cleaning the Contacts
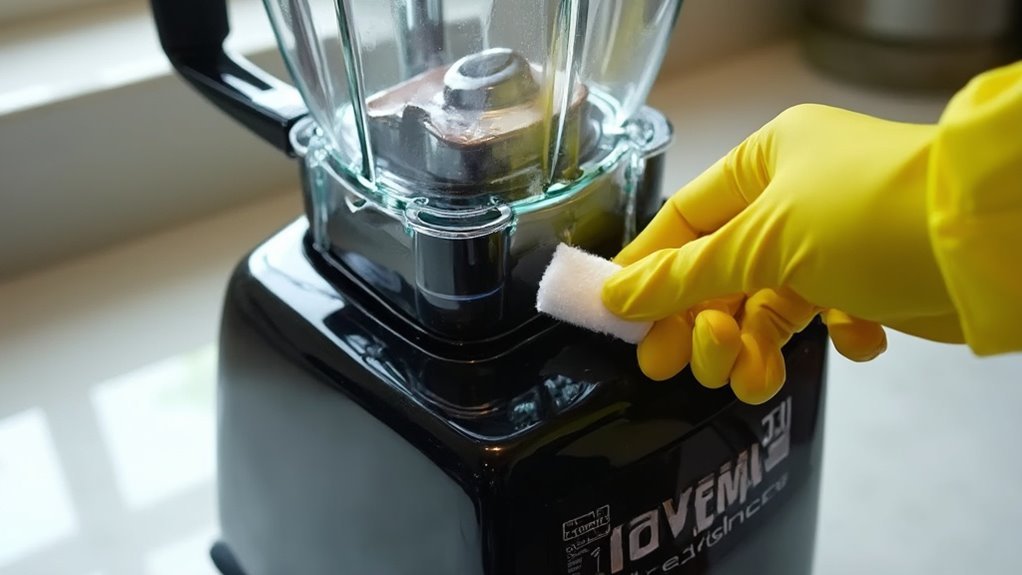
Keeping your Ninja blender running smoothly requires regular maintenance, including cleaning the contacts. Proper contact maintenance guarantees your blender performs efficiently and extends its lifespan. Here are some cleaning tips to follow:
- Unplug the Blender: Always start by unplugging your blender to guarantee safety. This prevents accidental electrical shock while cleaning.
- Inspect and Clean Contacts: Use a soft, dry cloth to gently wipe the contacts on both the base and the pitcher. Verify there's no residue, moisture, or debris that could disrupt the connection.
- Regular Maintenance: Make contact cleaning a routine task, ideally after each use. This prevents buildup and guarantees peak performance.
Investigating Overheating Issues
After guaranteeing the contacts are clean, it's time to address another common issue: overheating.
Overheating causes your Ninja blender to stop working because it triggers the thermal protection system. First, check the motor base for unusual heat. If it's excessively hot, let it cool down for at least 15 minutes.
Assure proper airflow by removing obstructions around the base and placing the blender on a flat, ventilated surface. Avoid blending thick ingredients continuously, as this strains the motor. Use pulse mode for demanding tasks.
If the blender still overheats, inspect the fan vents for blockages and clean them with a soft brush. By following these steps, you can prevent overheating and enjoy blending with the freedom you desire.
Testing the Internal Components
When your Ninja blender isn't performing at its best, testing the internal components can reveal hidden issues.
If your Ninja blender is underperforming, examining its internal components can uncover underlying problems.
To start, make sure the blender is unplugged for safety. Testing the internal circuit is essential to identify any component malfunction.
Here's how you can do it:
- Access the Circuit Board: Remove the base to expose the internal circuit. Look for signs of damage or burnt components.
- Check Continuity: Use a multimeter to check continuity across the circuit board. No continuity indicates a potential component malfunction that needs replacing.
- Inspect Connections: Make sure all wires are securely connected and free from corrosion or fraying.
Loose or damaged wires can interrupt power flow.
Conclusion
You've navigated the labyrinth of troubleshooting your Ninja blender with the precision of a seasoned detective. By checking the power source, ensuring proper assembly, and inspecting every nook and cranny, you've tackled the beast head-on. You've reset, cleaned, and examined each component as if piecing together a complex puzzle. With patience and persistence, your blender can roar back to life, ready to blend once more, like a phoenix rising from the ashes. Keep this guide handy for future culinary adventures.